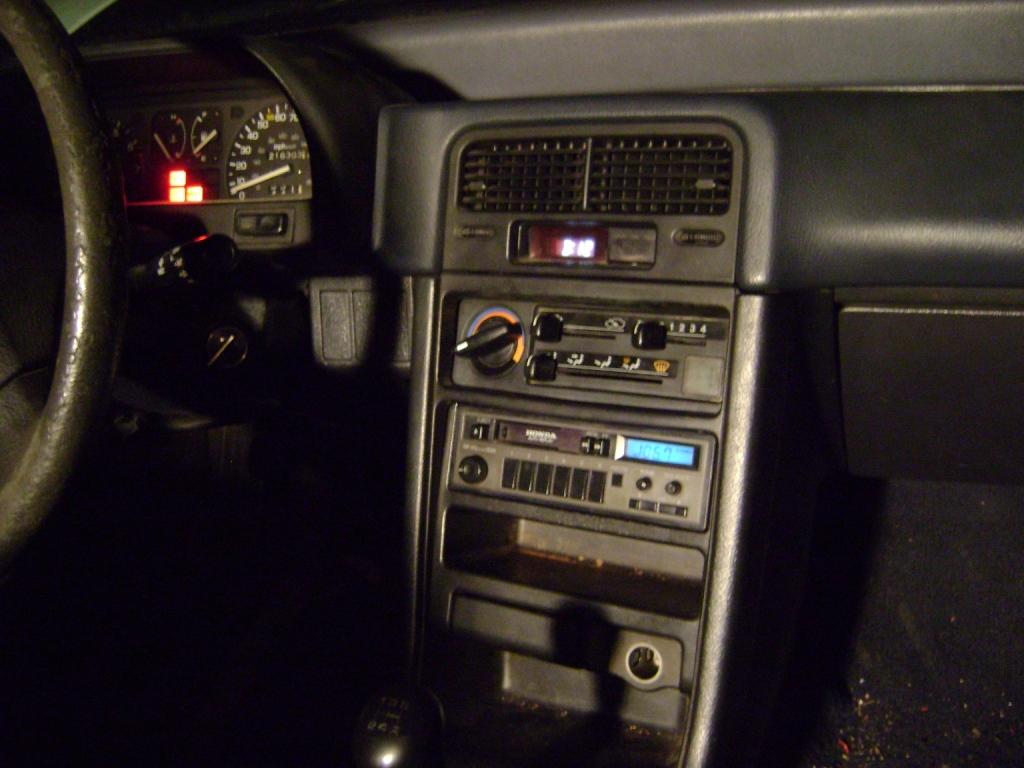
88-91 CRX-to-Civic Climate Control Conversion
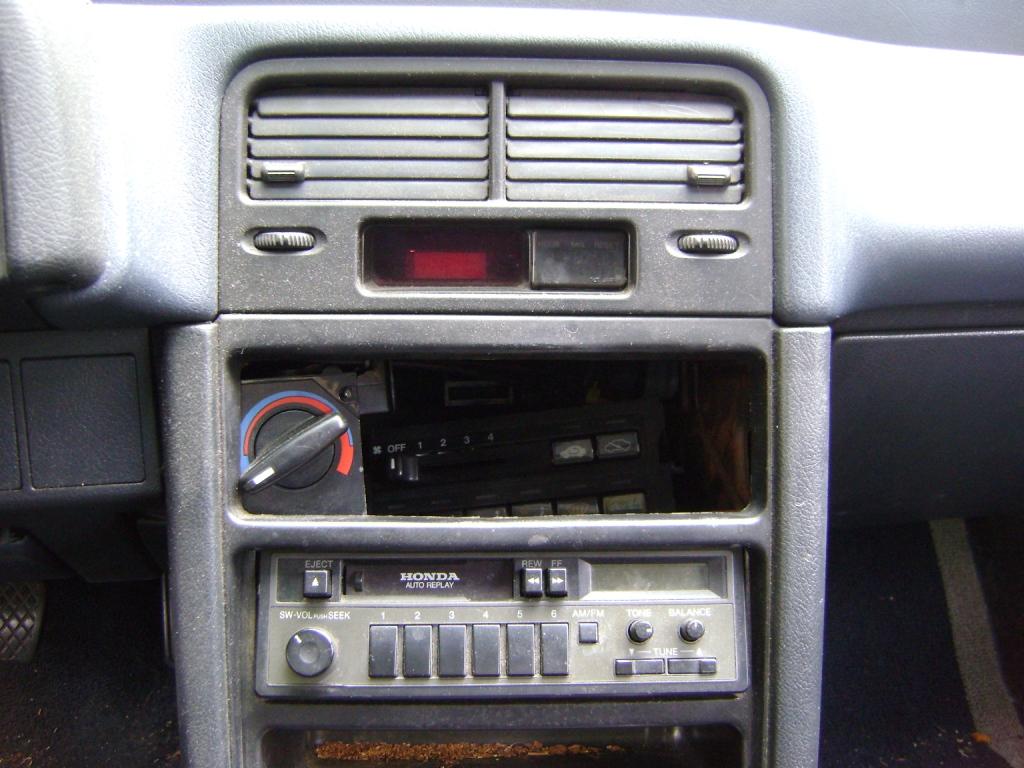
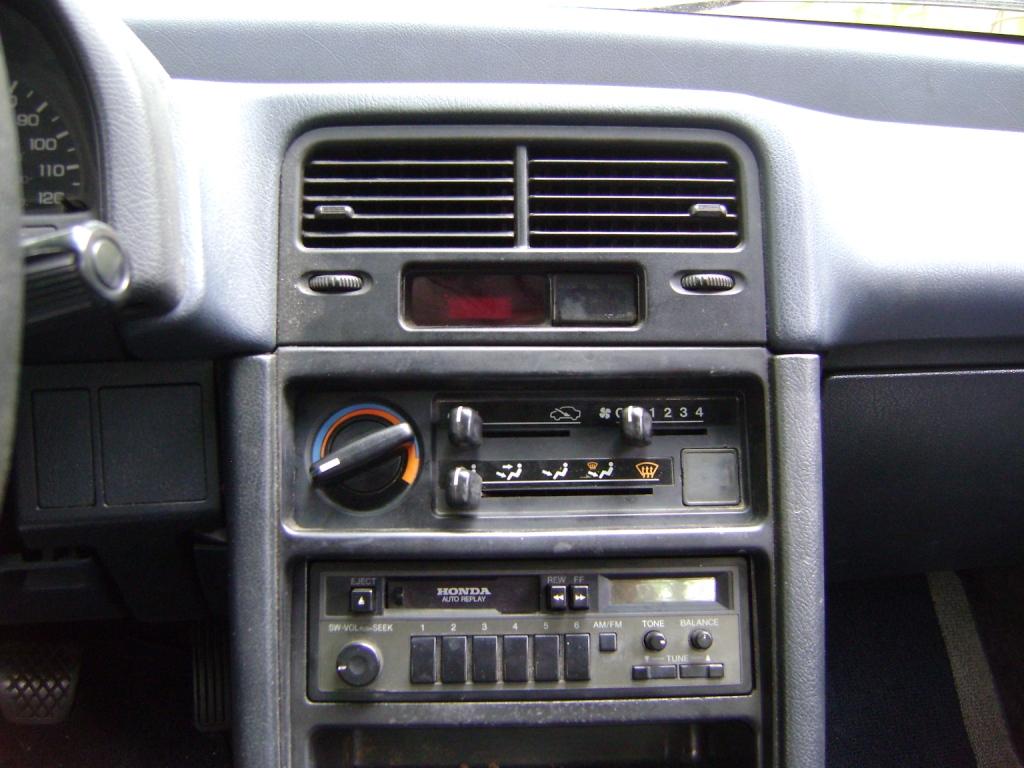
Most every second-generation CRX out there today suffers from a cracked or broken climate control assembly. There are a number of fixes available; they are all either too expensive (new OEM control panel), don't work all that well (Accord control panel swap), or are band-aid fixes (add-on face plates). The 88-91 Civic hatchback offers a climate control system that bolts in, looks/works like stock, and is more durable than the CRX parts.
Converting a CRX to a manual climate control setup is as simple as removing the old heater/blower boxes and replacing them with Civic parts. Only very little wiring is needed; a two-pin plug used for control panel illumination has to be spliced into the existing CRX wiring.
The following parts are needed from an 88-91 Civic:
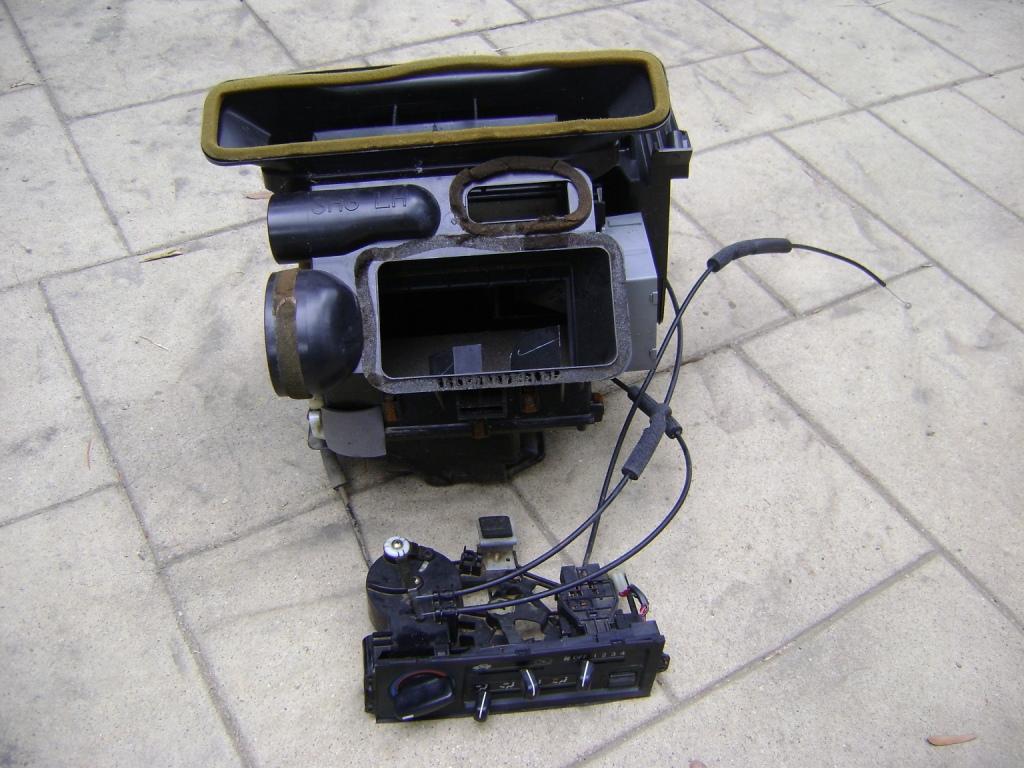
This should go without saying, but if using parts from a car that has been wrecked, watch for broken glass inside the heater/blower boxes and ducts. Any shards of glass left behind will blow into your face the first time you turn on the blower motor!
Although not absolutely necessary, a Honda factory service manual for an 88-91 CRX will help with disassembly in case you get stuck.
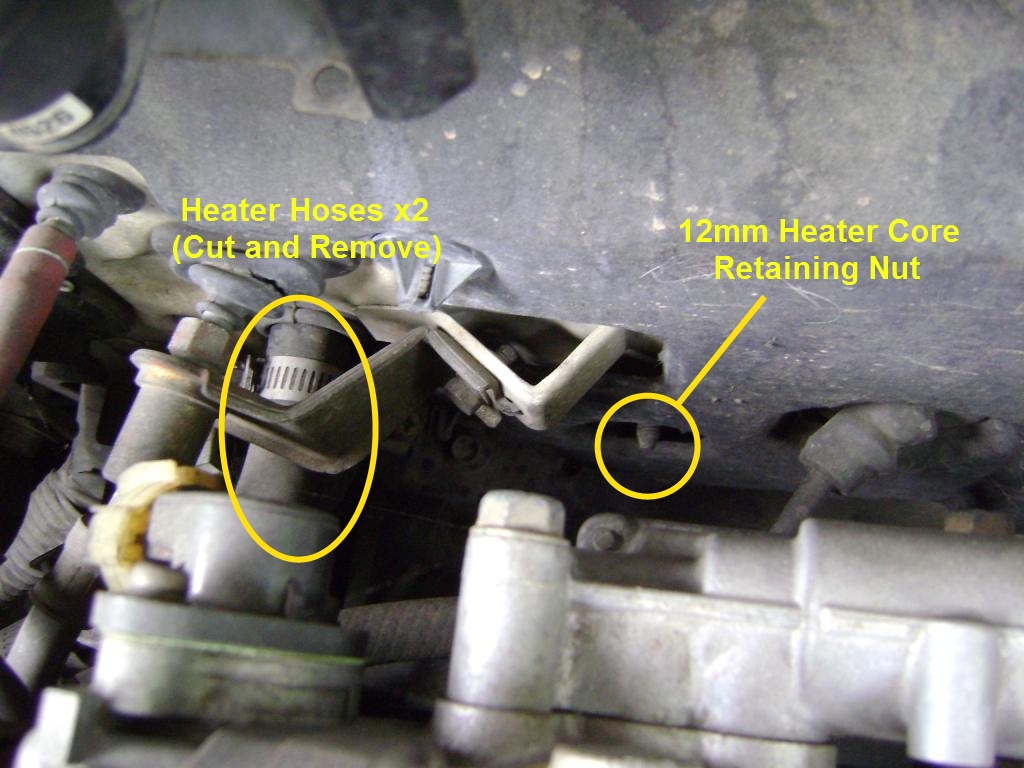
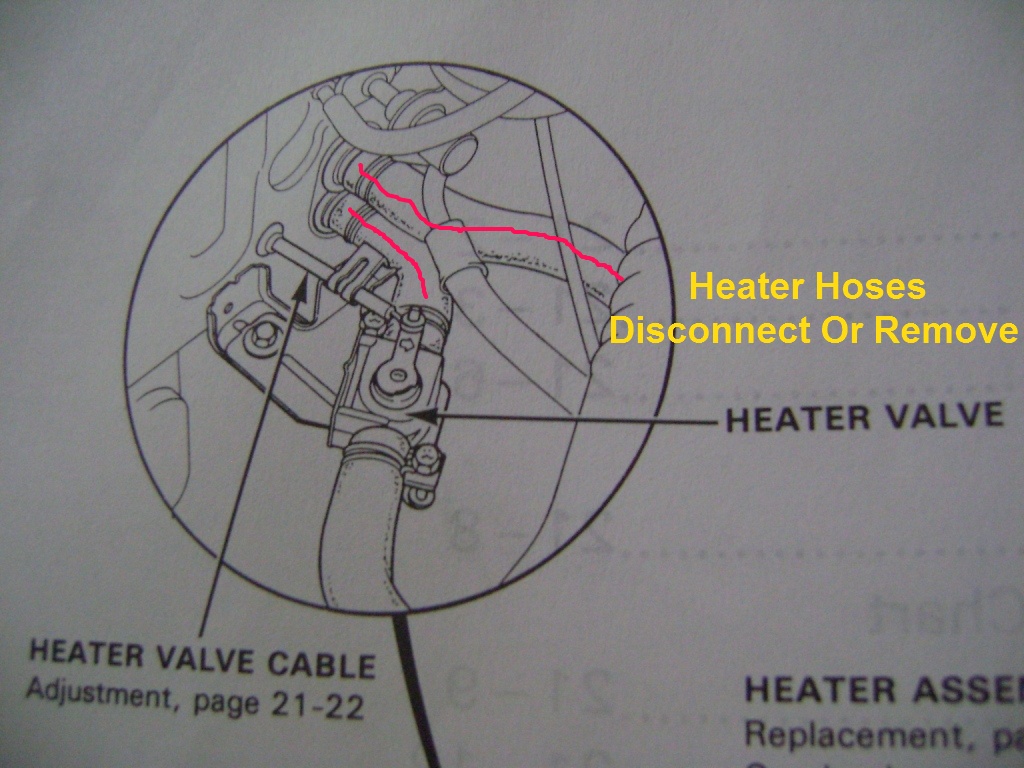
Begin the removal by draining the coolant and disconnecting the battery. Once all the coolant is out, remove the heater hoses going from the heater core at the firewall to the engine and heater valve as shown below. Also, remove the 12mm heater core retaining nut.
Moving inside the car, prep the dashboard for removal. Remove the center console and cluster hood. Next remove the six 10mm dashboard retaining bolts.
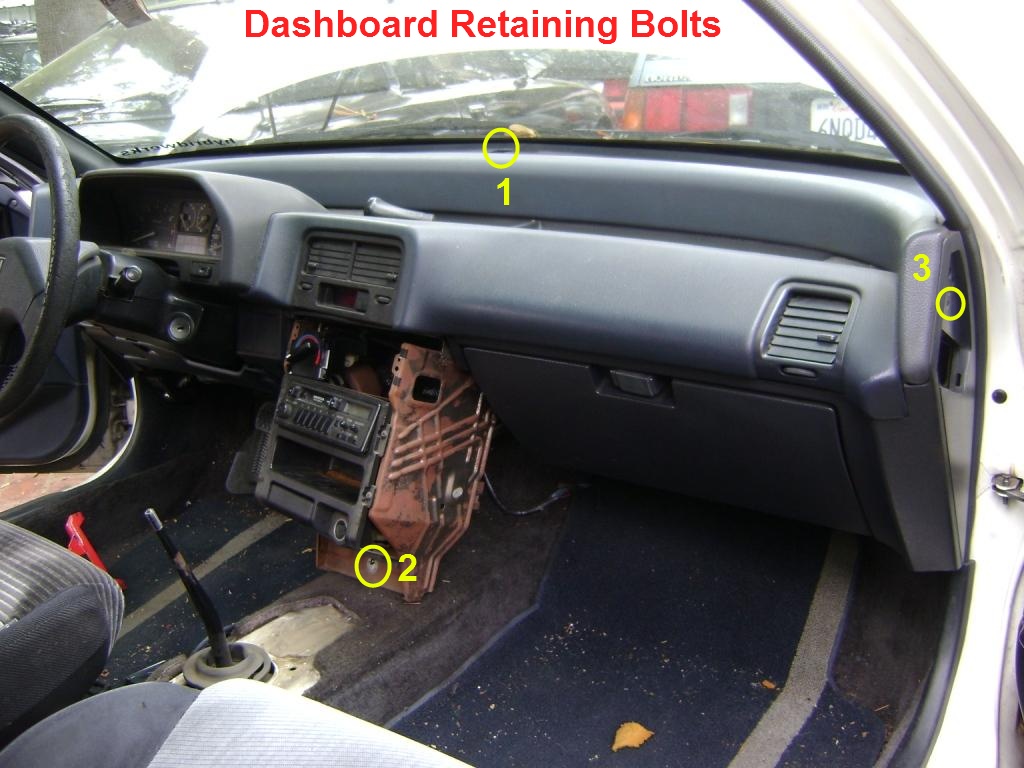
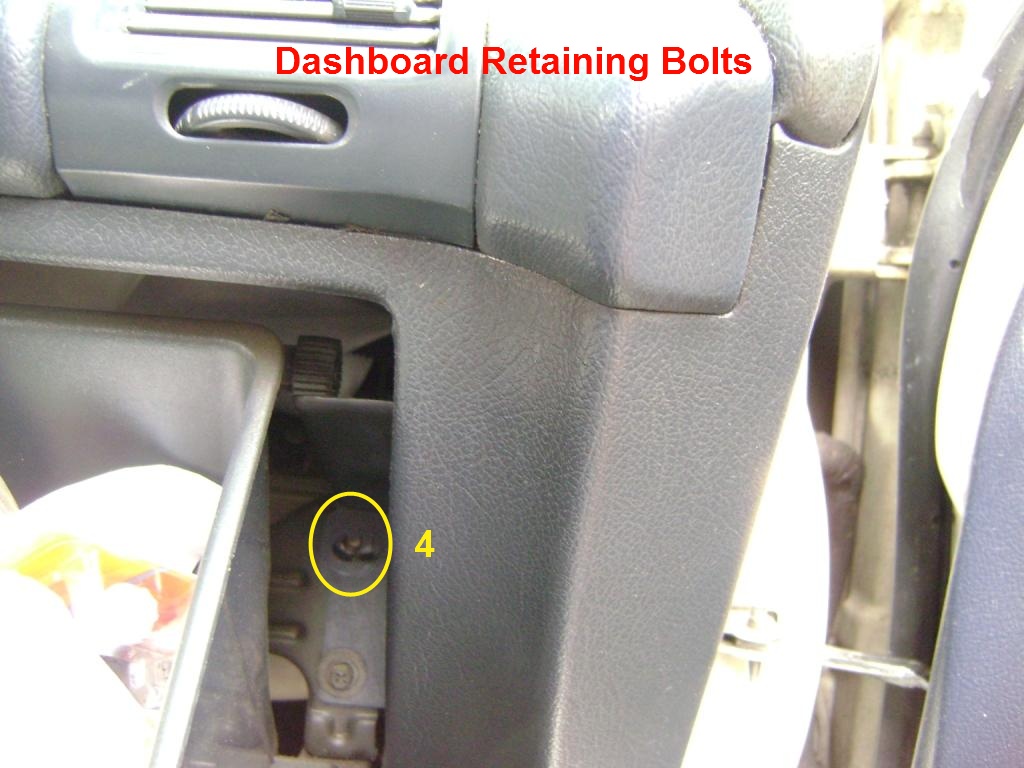
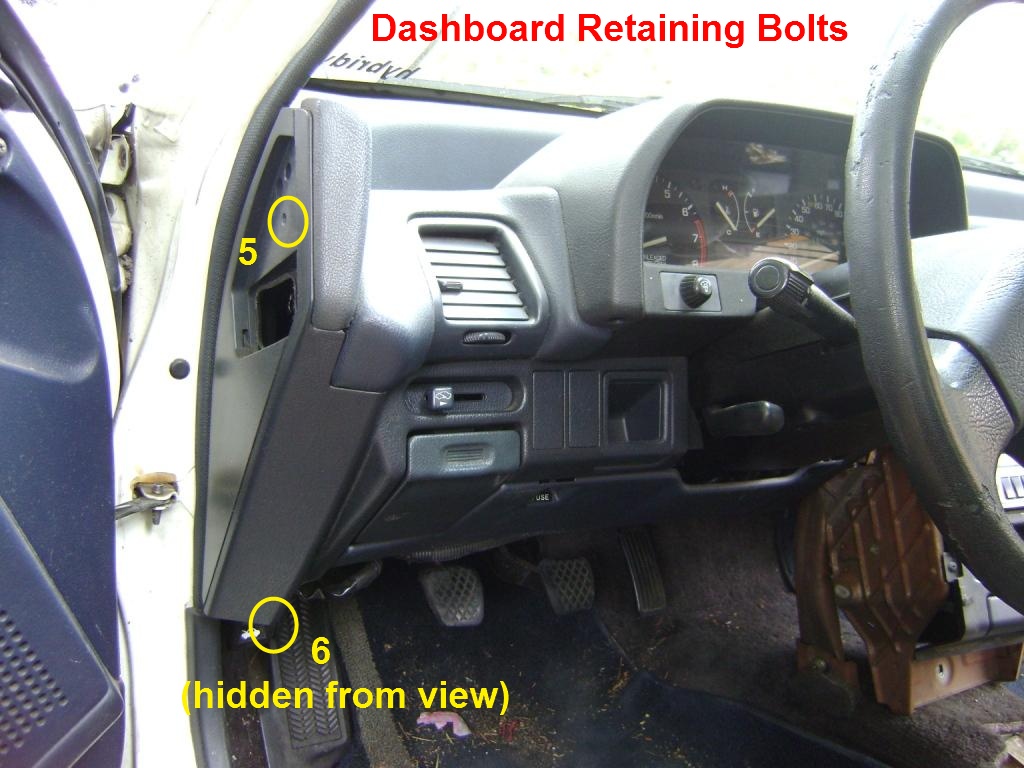
Once the dash bolts are out, remove the side air vent control lever as shown in the pictures below. If you forget this step, you'll have a real hard time removing the dash.
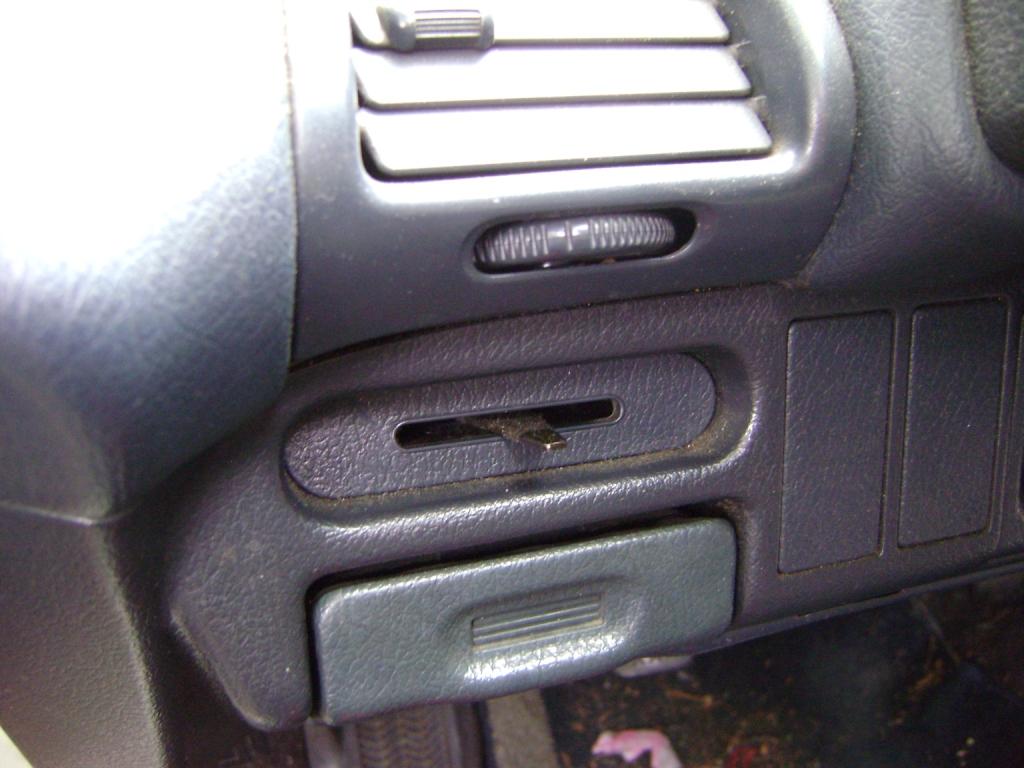
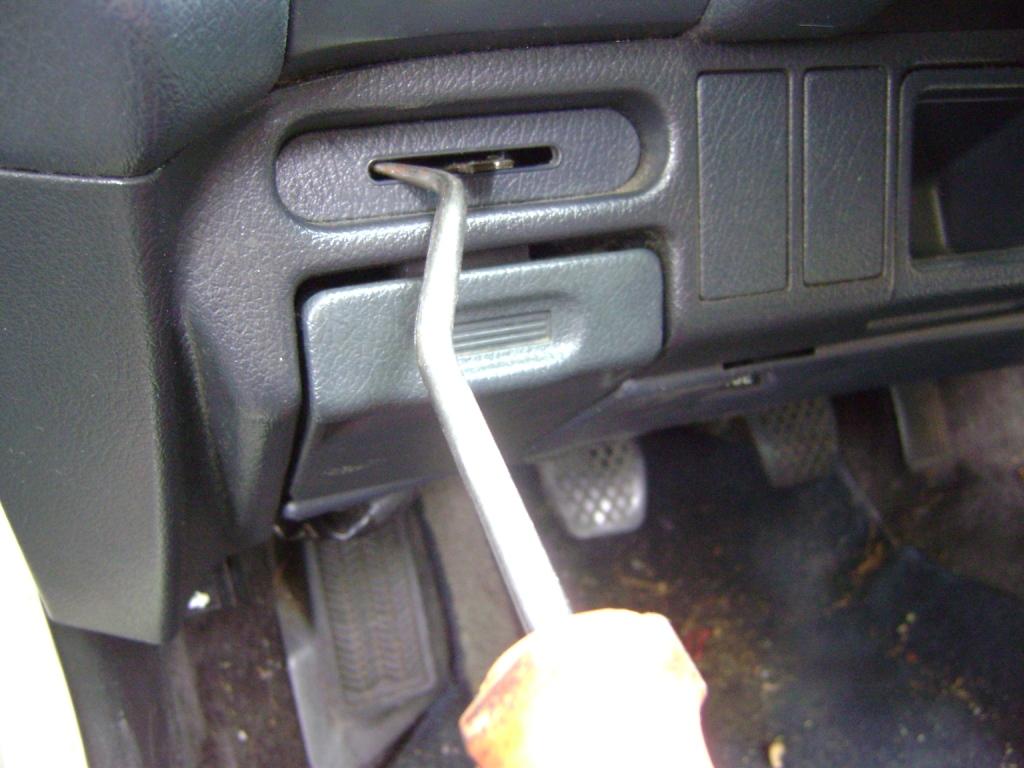
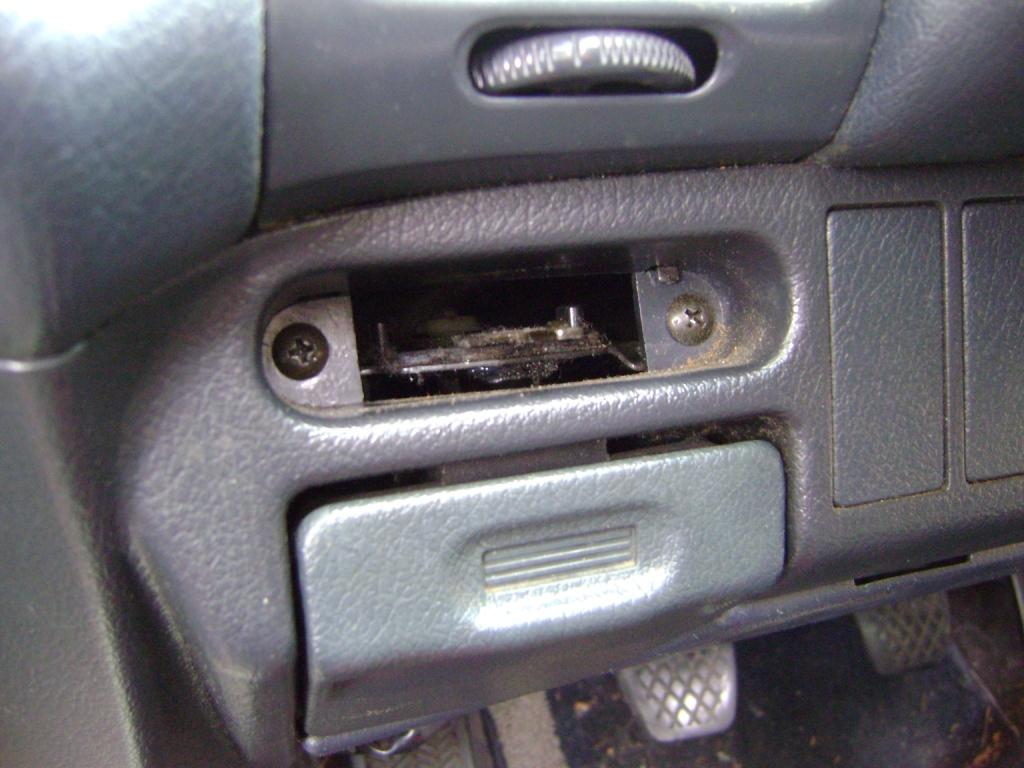
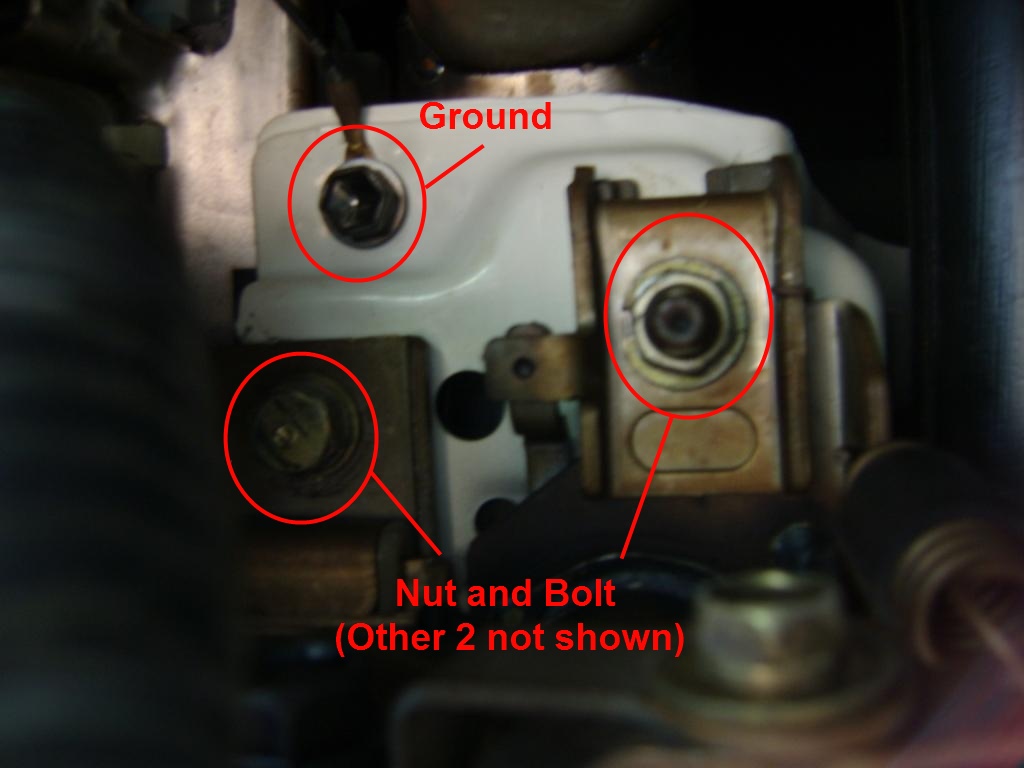
Next, remove two 12mm nuts and two 12mm bolts to drop the steering column. Also, remove this 10mm ground bolt.
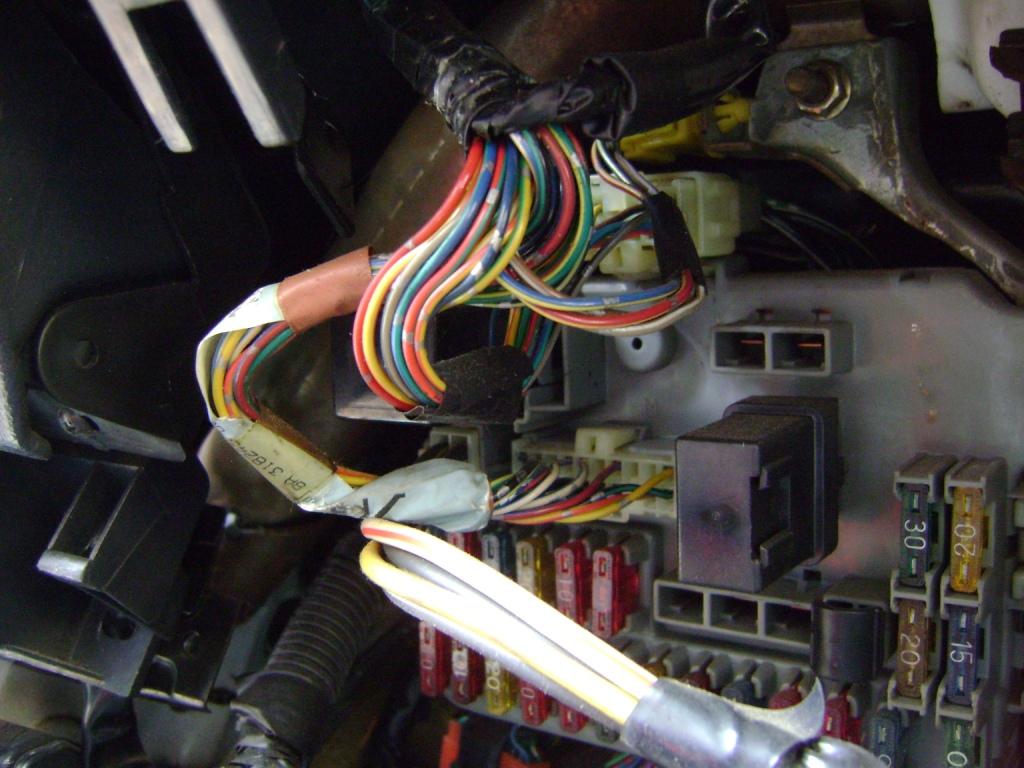
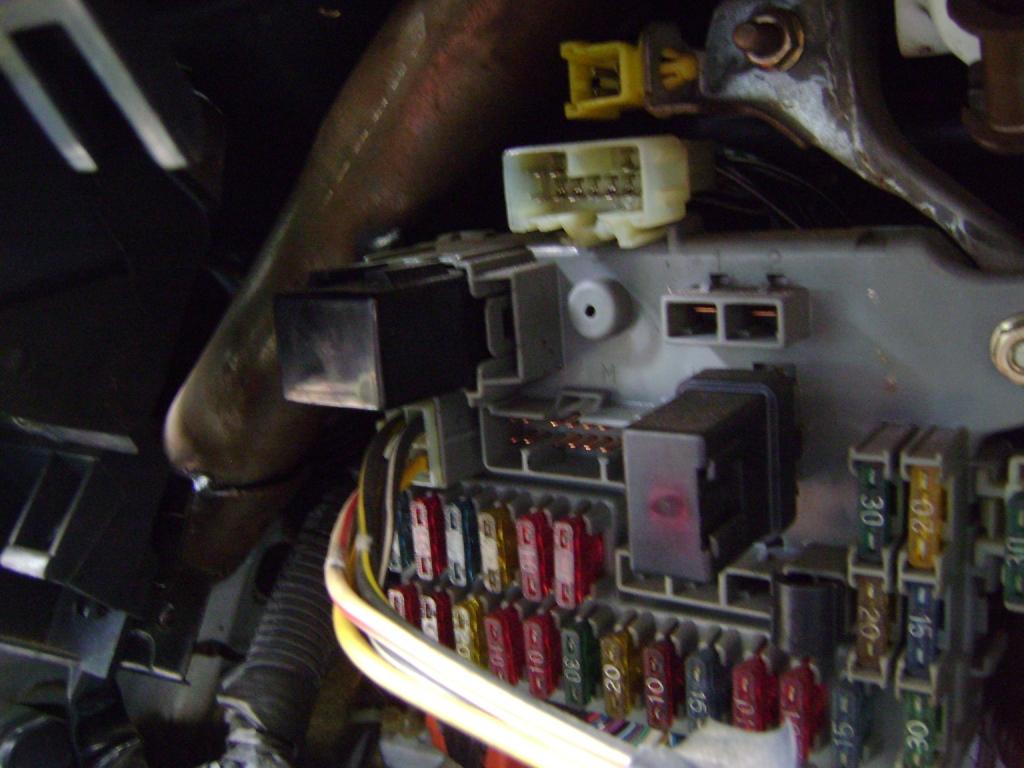
Disconnect the dash harness as shown below. Simply unplug these connectors from the dash fuse box.
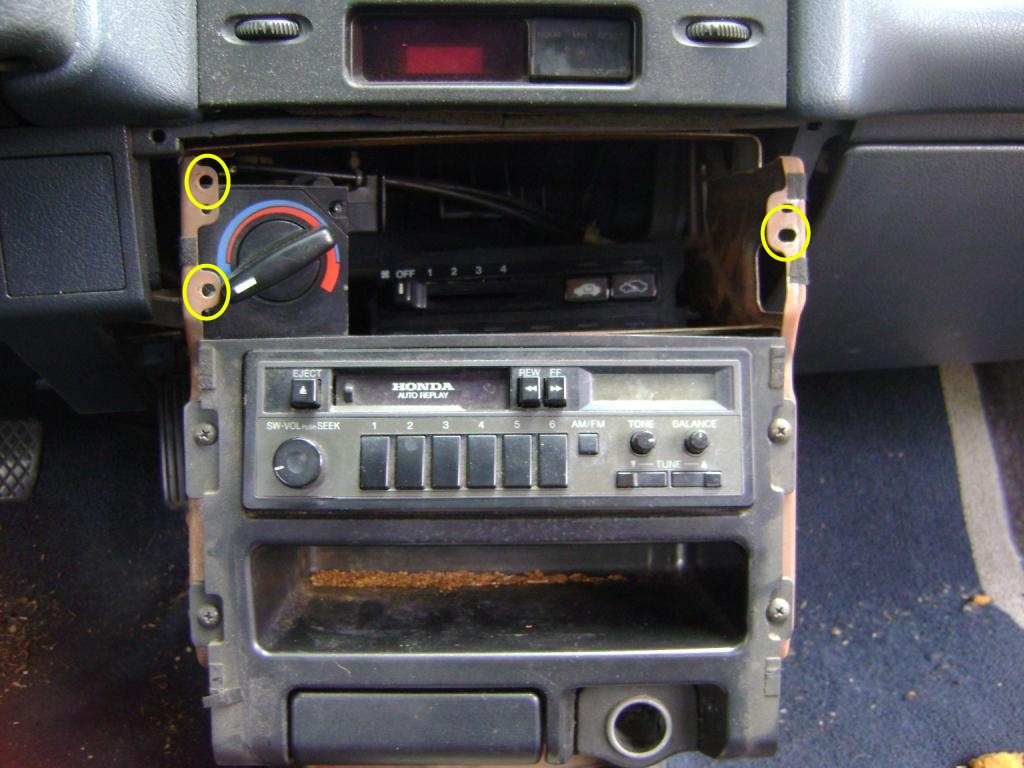
Remove the old climate control panel by removing these 3 screws.
Lastly, unplug the speedometer cable at the back of the gauge cluster.
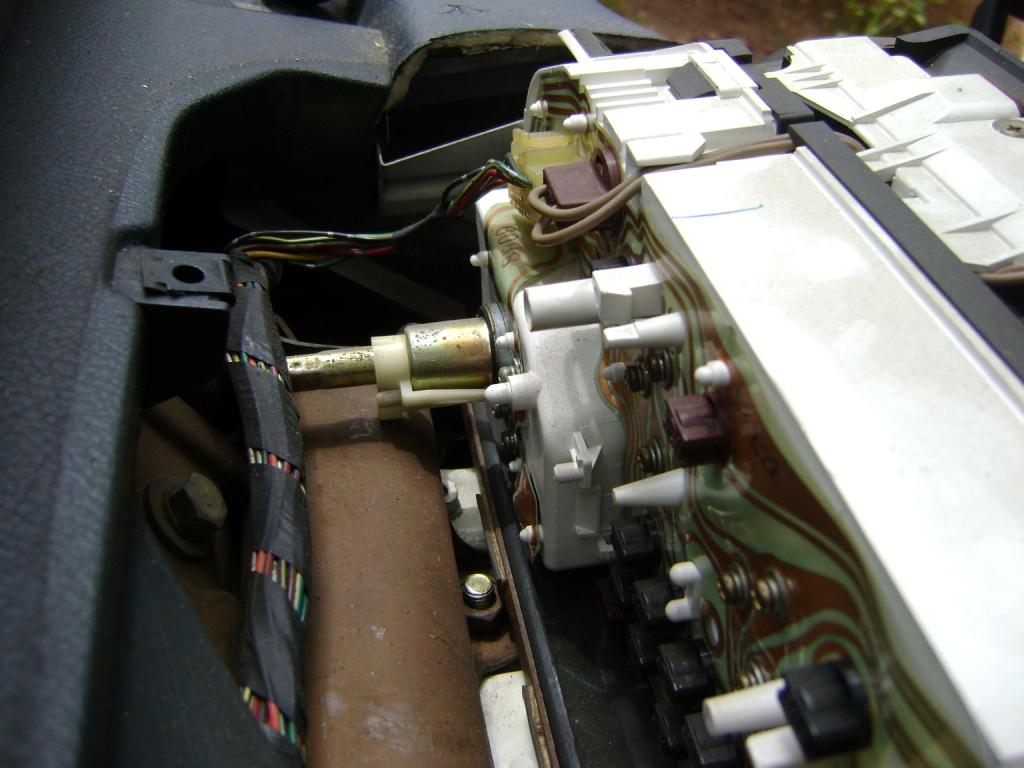
The dashboard should now lift straight out. Removing the dash can be accomplished by a person working alone, but a helper makes things a whole lot easier.
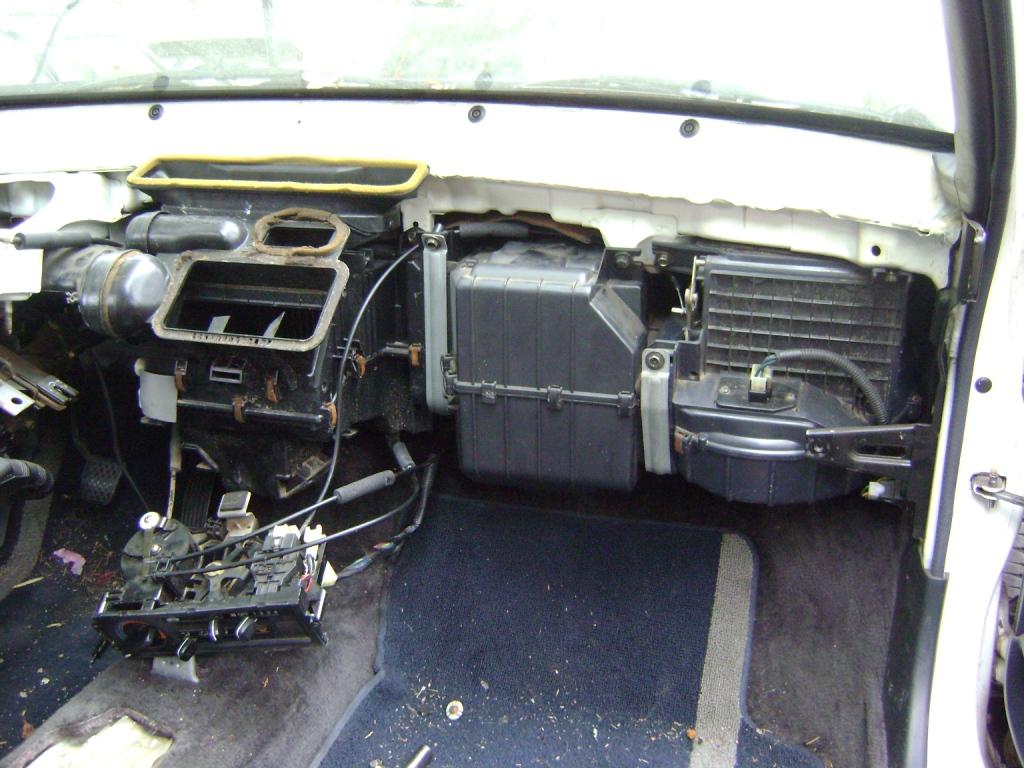
Once the dash is out, this is what you should be left with. The heater core and blower box in the yellow boxes is what you will be replacing. Cars with A/C will have an evaporator box as shown in this picture. To remove the heater core and blower, you will need to unbolt and slightly move the A/C evaporator box for clearance. Make sure not to kink or otherwise damage the metal A/C lines connected to this or you risk a refrigerant leak (expensive repair).
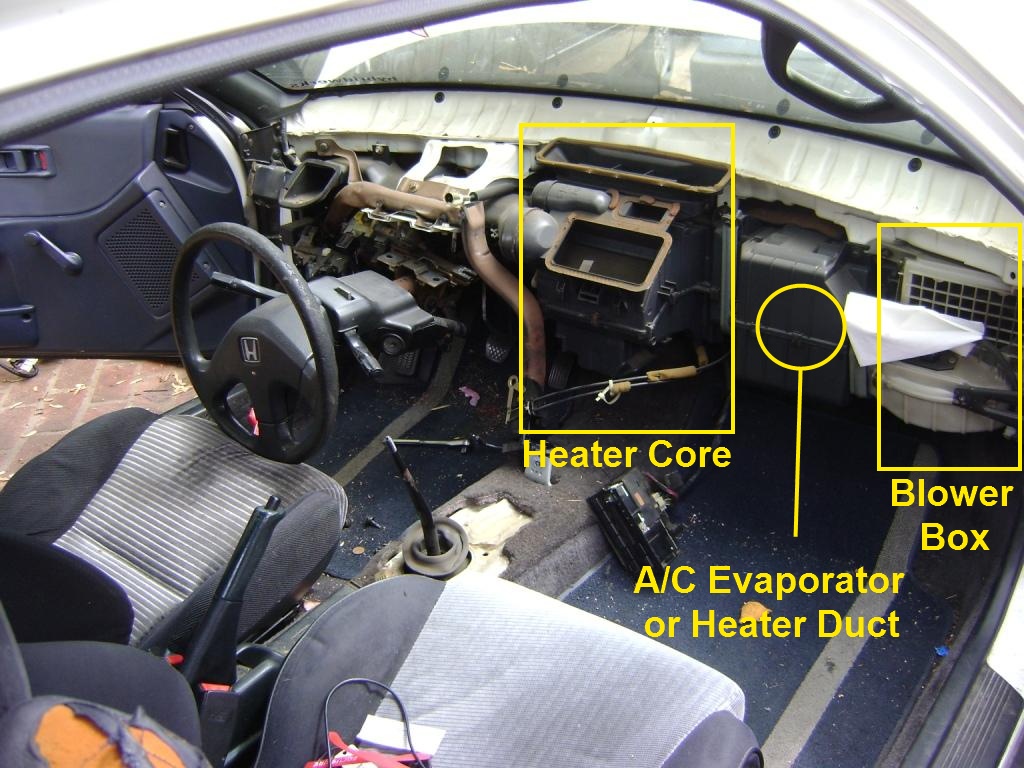
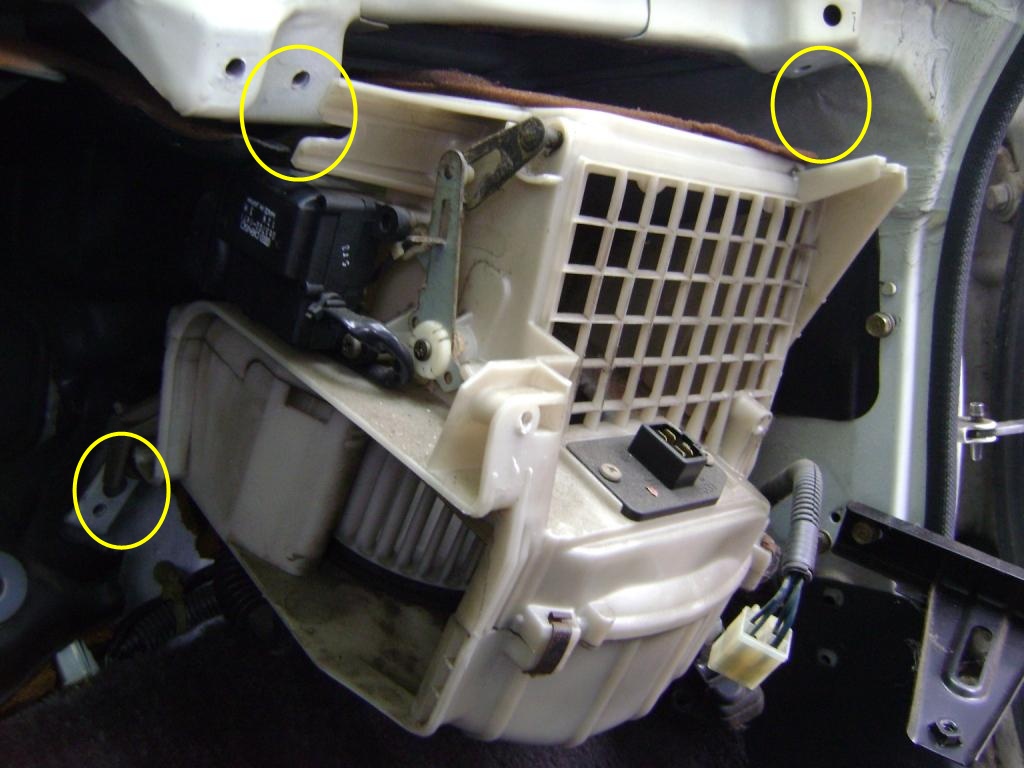
Pull out the climate control panel with all cables attatched. Then, remove the bolts in the pictures below to free the heater core and blower box. You should have previously removed the heater hoses and 12mm retaining nut in the engine bay, but the heater core box will still be a bit tricky to remove.
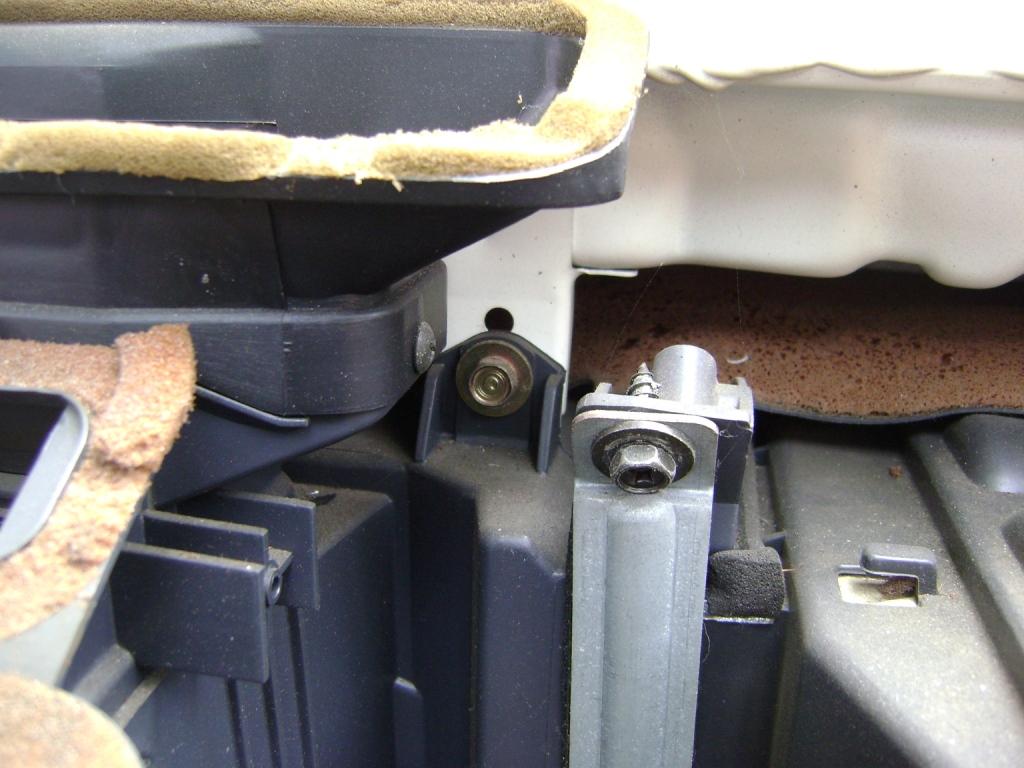
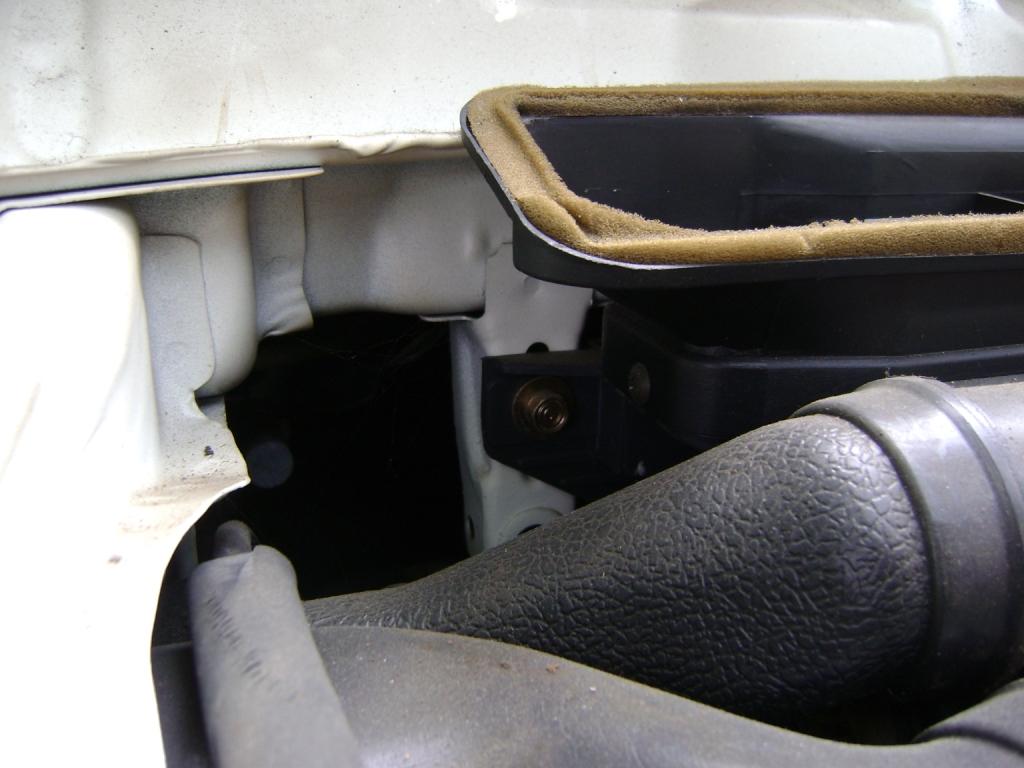
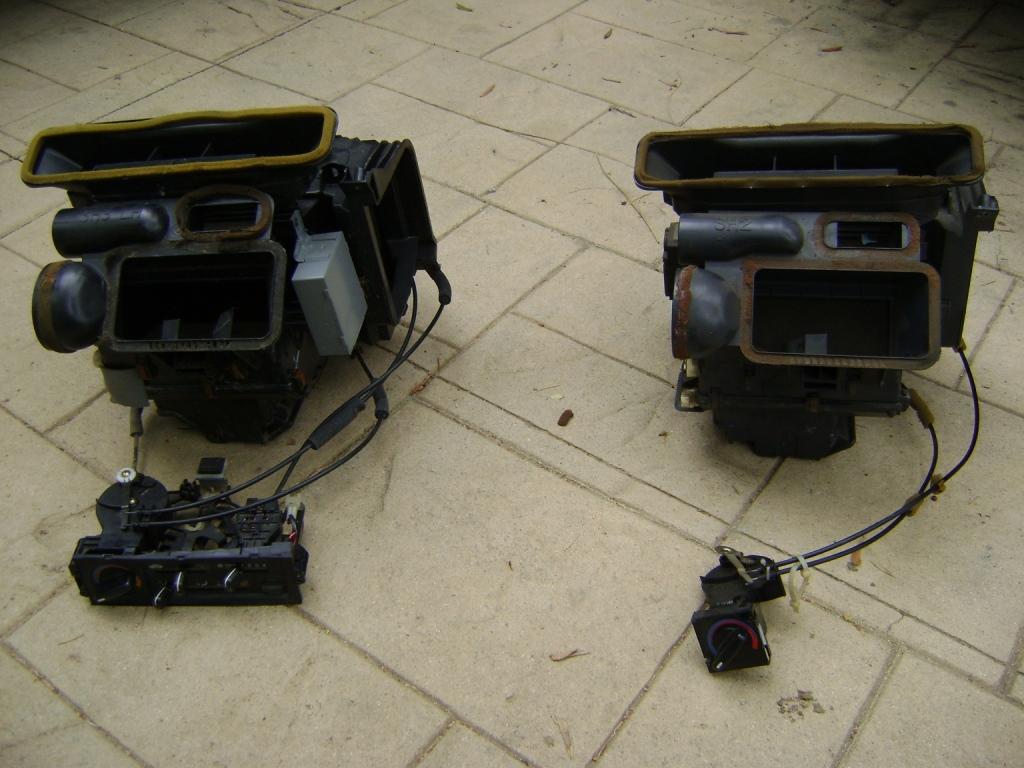
Below you can see the the old CRX vs. new Civic parts. The main difference between the CRX and the Civic is that the CRX uses motors to change ventilation/temperature/recirculation modes while the Civic is cable actuated. Because of this, there will be unused electrical plugs left over when you're done.
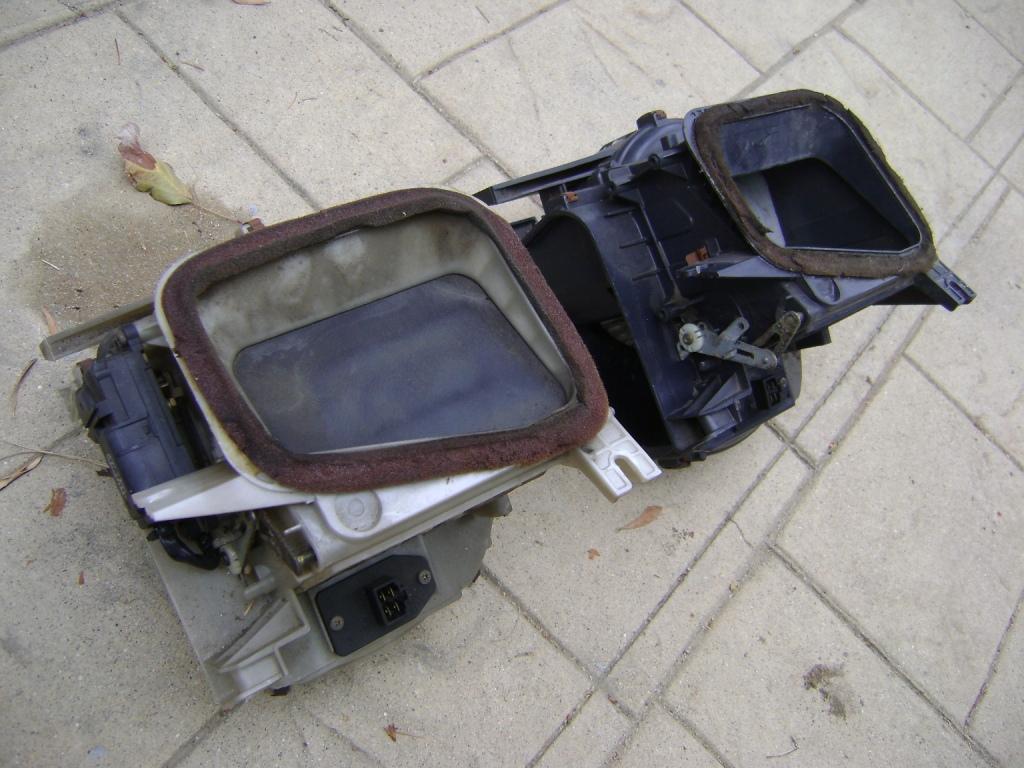
Installation is pretty much reverse of removal. The new parts bolt in just how the old ones came out of the car. One important exception is a metal locating bracket at the rear of the new Civic climate control panel. It does not fit properly in the CRX dash, so simply unscrew the bracket and throw it away.
Also, re-install the heater hoses you took out previously or install new ones if the old ones were damaged.
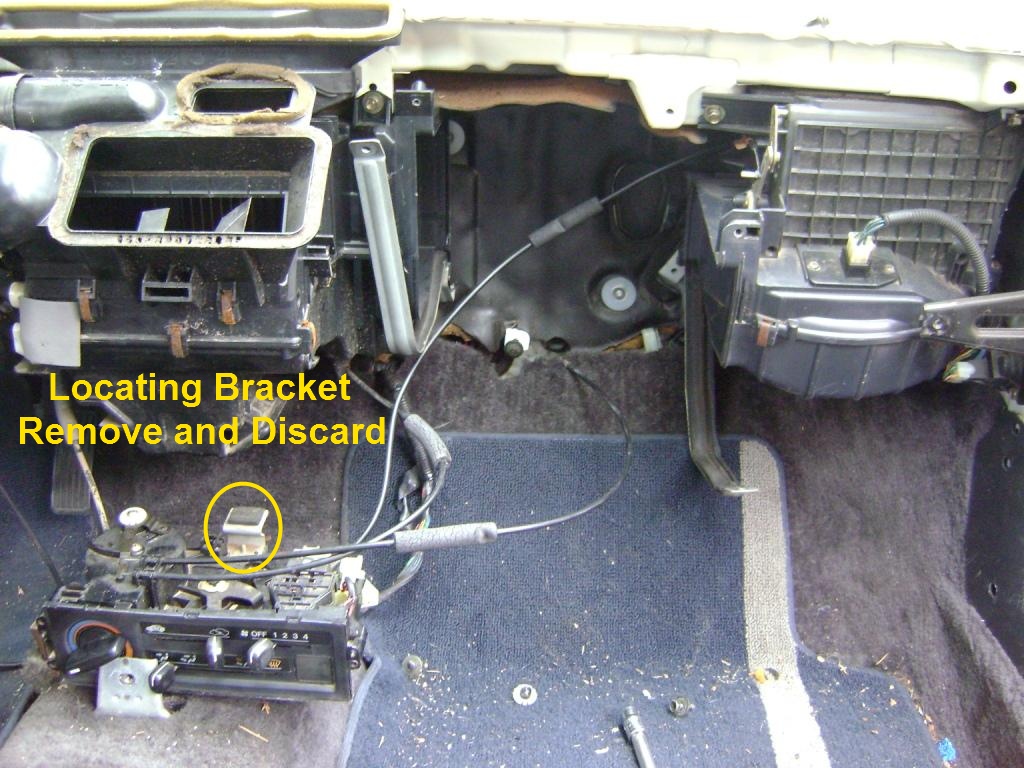
Installed:
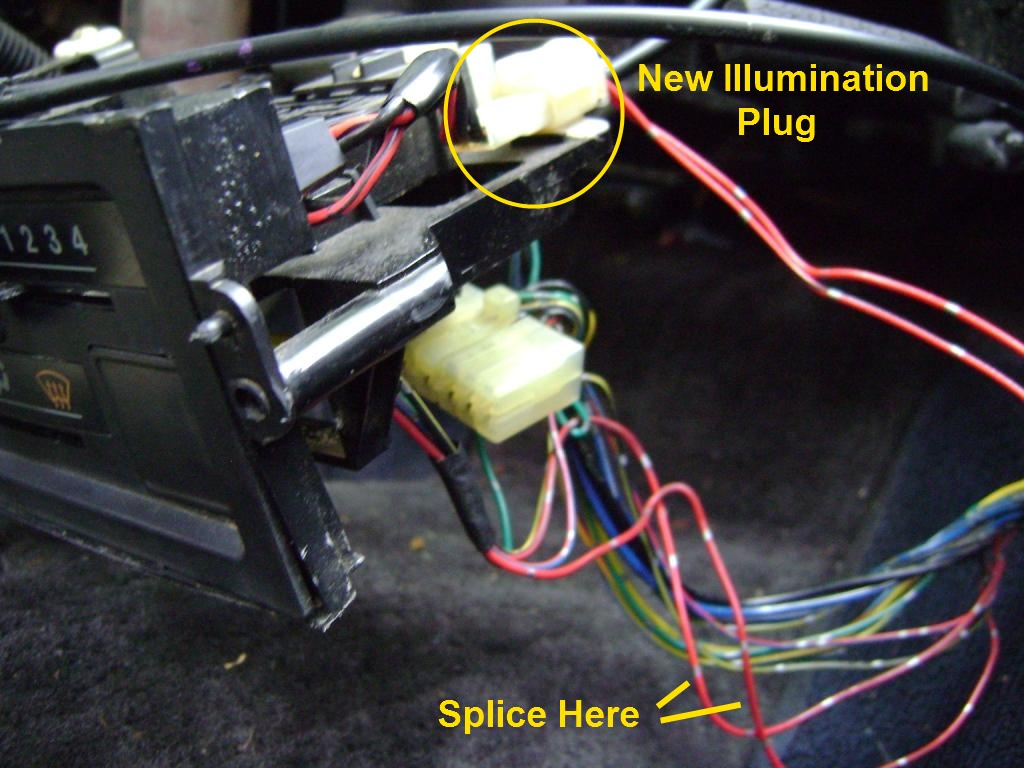
The wiring portion of this conversion is cake. All the old wiring plugs in, save for a couple of electrical plugs that go unused. The only real difference is a plug that is added for control panel illumination. Splice this new two pin plug into the A/C switch plug wiring, color-for-color (red to red and red/blk to red/blk).
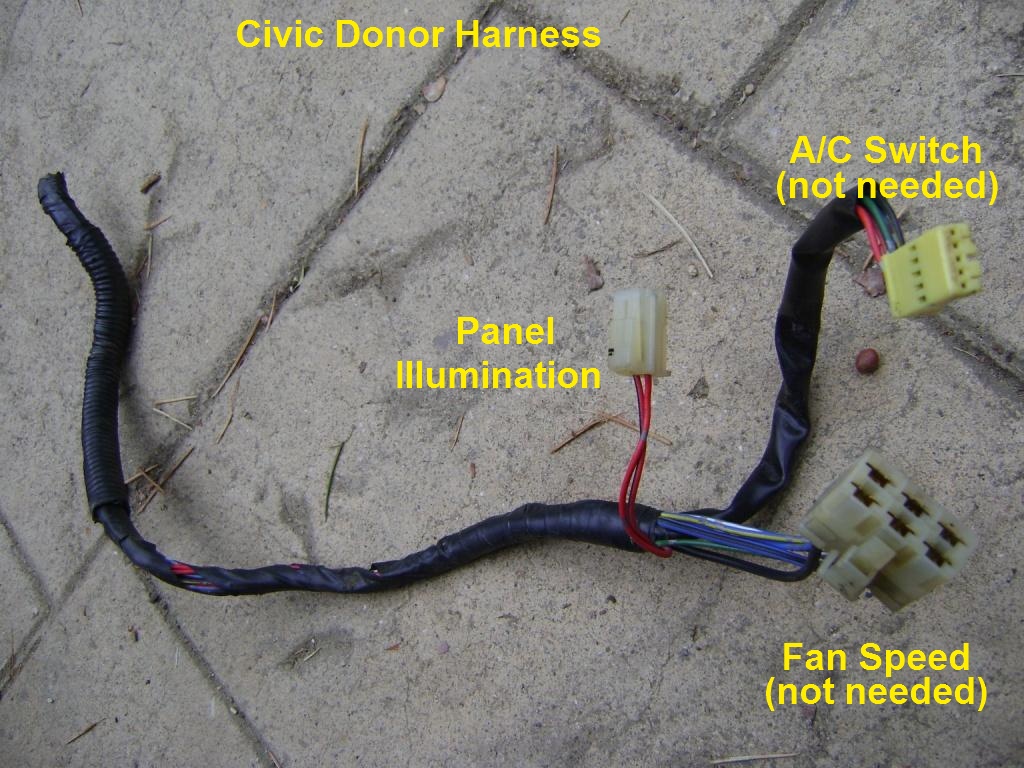
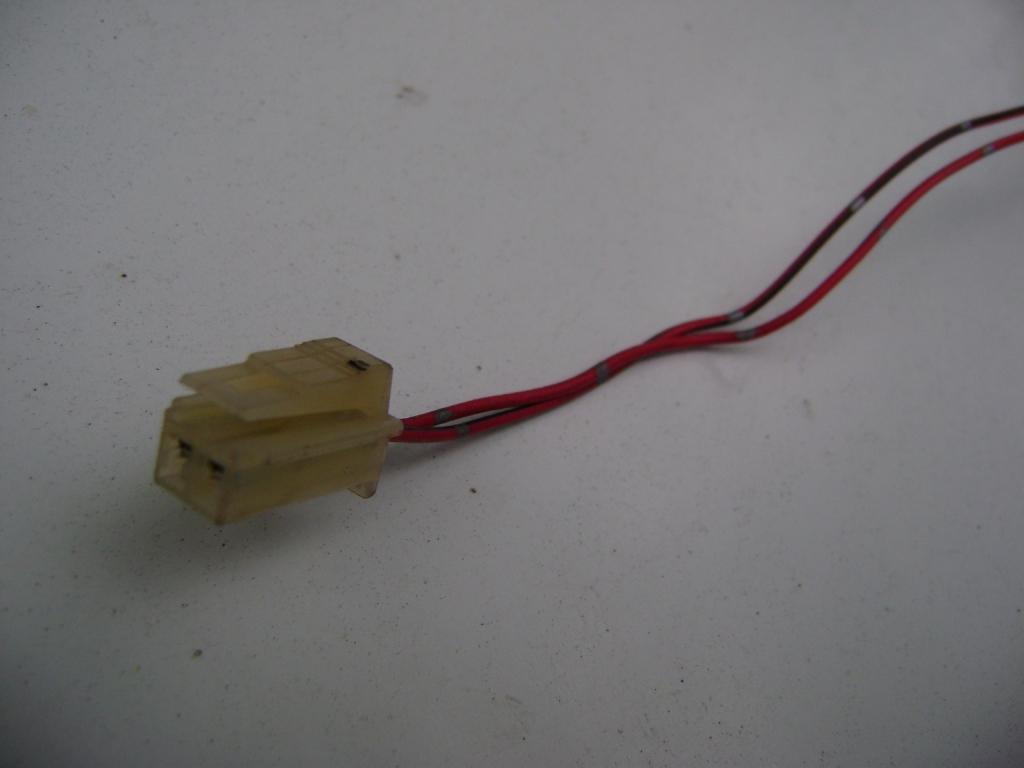
Unused plugs:
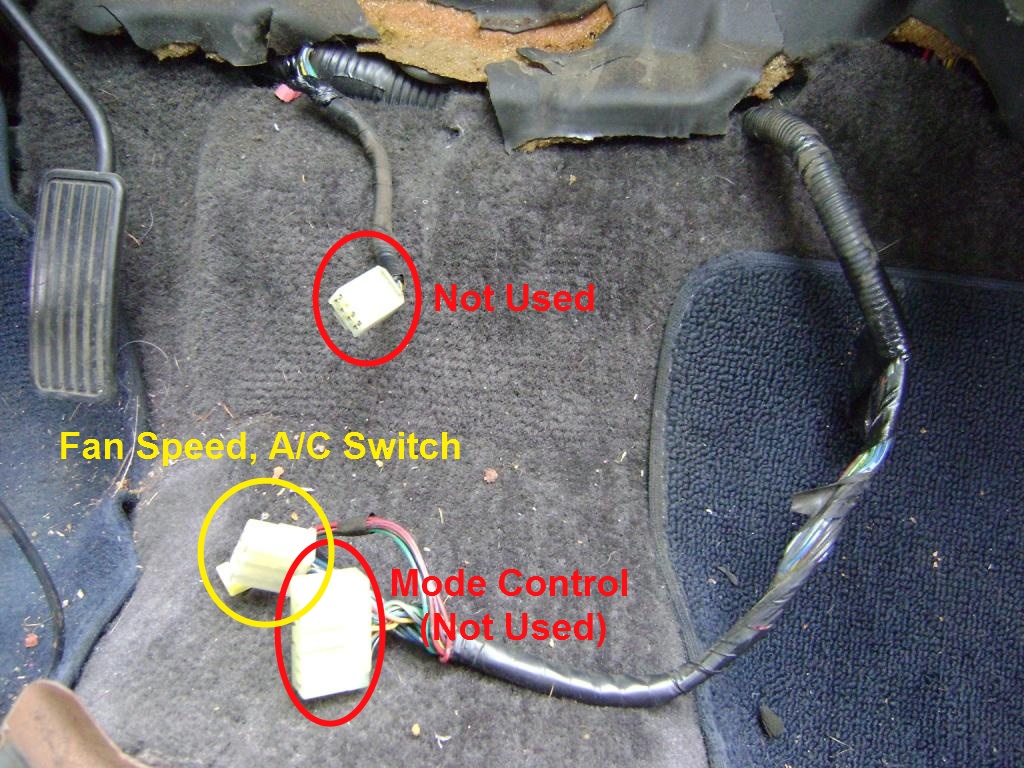
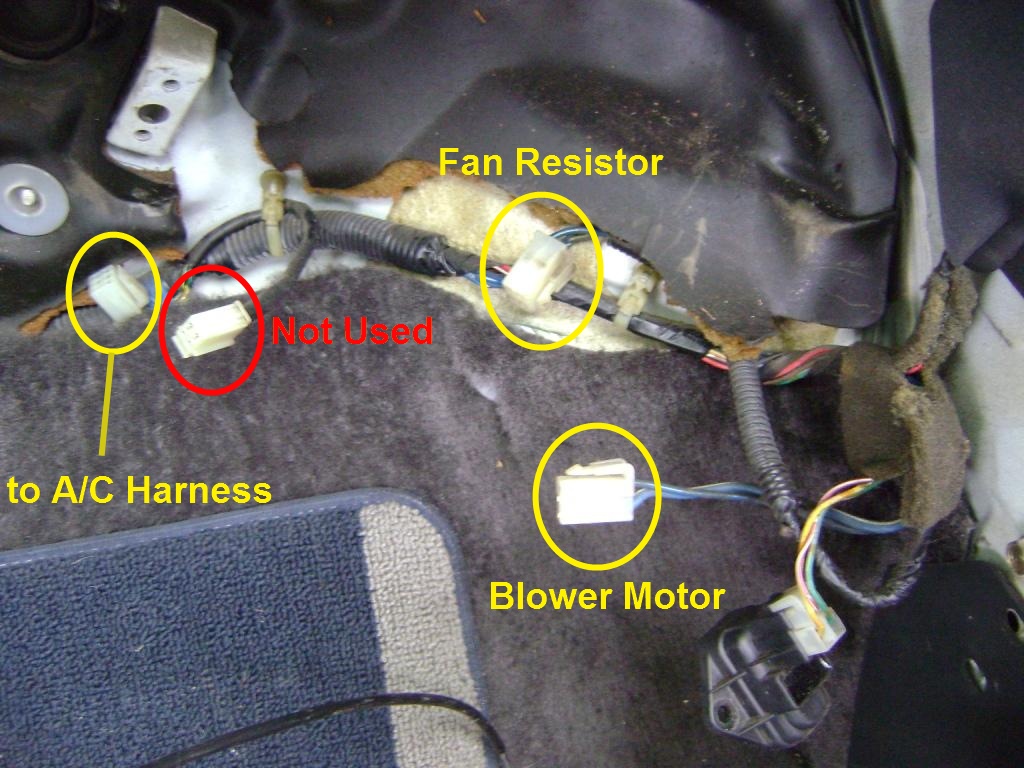
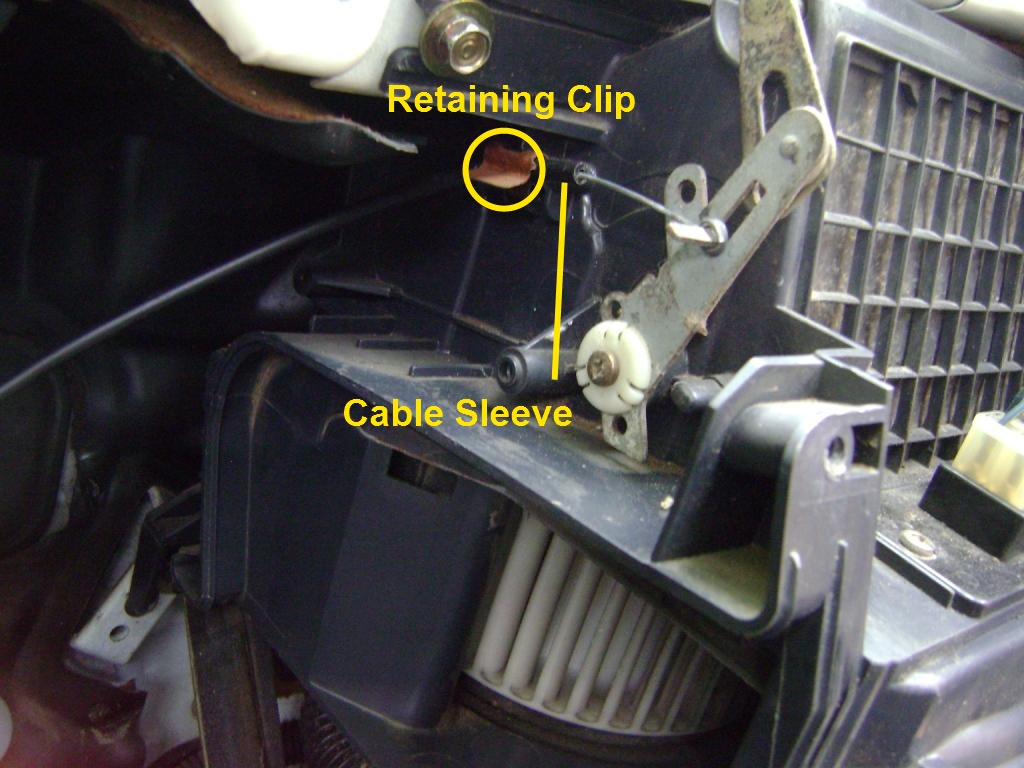
Once everything is installed, you can adjust the heater valve and recirculation cables. The factory service manual explains it best, but basically once you have the cables adjusted to where they work they way they should, slip the cable sleeve into its retaining clip as shown below.
Final Install. Now Jason can defog his windows when he takes his mom to work in the morning!